
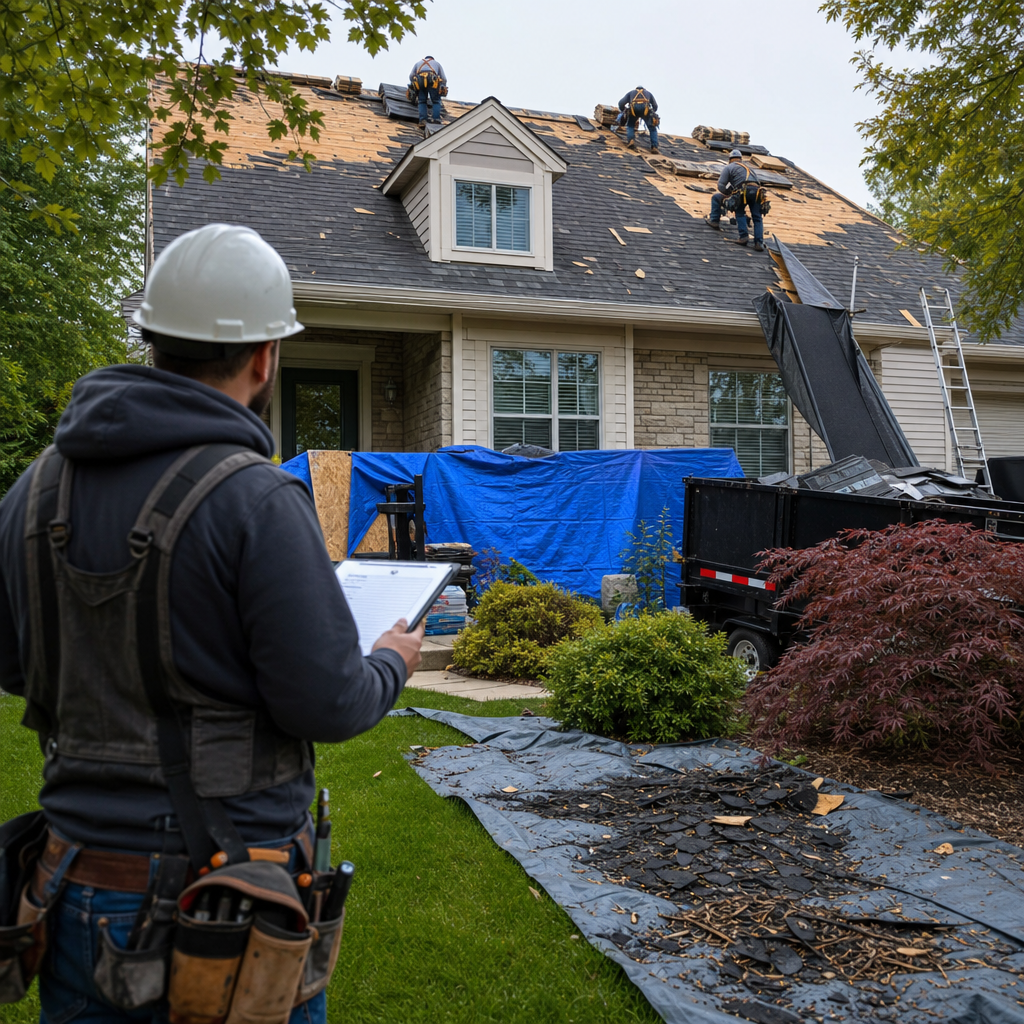
How to Protect Your Property During a Roof Replacement Project
Why Roof Replacement Poses Unique Risks to Your Property
A roof replacement is a significant investment in your property’s longevity and protection. Yet during the work itself, your home faces temporary vulnerabilities that deserve careful planning. At Expert Exteriors, we’ve helped countless property owners in Brookfield and surrounding areas navigate roof replacement projects safely, and we know that understanding what happens to your property during this time can ease concerns and help you prepare effectively.
Roof replacement involves removing your home’s primary weather barrier, which means exposure to the elements and increased traffic on and around your property. Unlike other renovation projects, roofing work happens directly above your living space, creating multiple points of potential damage if precautions aren’t taken seriously.
Falling debris, water intrusion during rain events, and foot traffic in unexpected areas are common risks. Heavy equipment moves across roofing materials, and nails, shingles, and metal flashing can scatter into gutters, landscaping, and yards. Inside your home, dust and particulates from old roofing materials can settle on surfaces, belongings, and HVAC systems if not properly contained.
The temporary removal of roof sections also creates vulnerability to weather. If rain arrives during the project window, water can penetrate interior walls, attic spaces, and ceilings. Structural integrity isn’t at risk with professional crews, but interior damage and staining can occur without proper protective barriers.
Your action: Request a detailed walk-through with your contractor before work begins to identify high-risk areas unique to your property layout.
Understanding the Scope of Roof Replacement Disruption
A typical residential roof replacement spans three to seven days, depending on your roof’s size, pitch, and material selection. During this window, your property experiences noise, limited driveway access, and constant worker presence. Understanding this scope helps you plan for family schedules, pet management, and vehicle parking.
Commercial projects often run longer and may require phased work to maintain building operations. The scope also depends on whether crews are performing a complete tear-off (removing existing materials to the deck) or an overlay installation. Tear-offs create more debris but provide thorough inspection of underlying structures.
Weather acts as the primary disruption factor. A sunny forecast might compress your timeline, while rain delays extend the project. Each day’s work leaves your roof partially exposed overnight, which is manageable with quality tarping but still a consideration for property security and weather monitoring.
Review our guide on exterior replacement timelines to set clear expectations for your specific project.
Your action: Ask your contractor for a day-by-day breakdown of what to expect, including when roof sections will be uncovered and temporary weather protection measures will be in place.
Pre-Project Communication and Planning with Your Roofing Contractor
The foundation of property protection is transparent communication before the first nail is driven. We schedule a detailed pre-project meeting with every homeowner to discuss access routes, parking arrangements, equipment placement, and specific concerns about landscaping or nearby structures.
During this conversation, clarify the following:
- Where equipment and material staging will occur
- Which gates, pathways, or access points crews will use
- How long your driveway will be unavailable
- Whether water or electricity access is needed
- Specific areas you want protected or off-limits
- Your preferred communication method during the project
This isn’t a casual check-in. We use it to identify potential issues, confirm protective measures, and establish expectations on both sides. If you have pets, elderly relatives, or vehicles parked on-site, mention this now so crews can plan accordingly.
Your action: Create a written list of your three to five biggest concerns and share it with your contractor at least a week before work begins. Request written confirmation that these concerns are acknowledged.
How We Implement Comprehensive Property Protection Measures
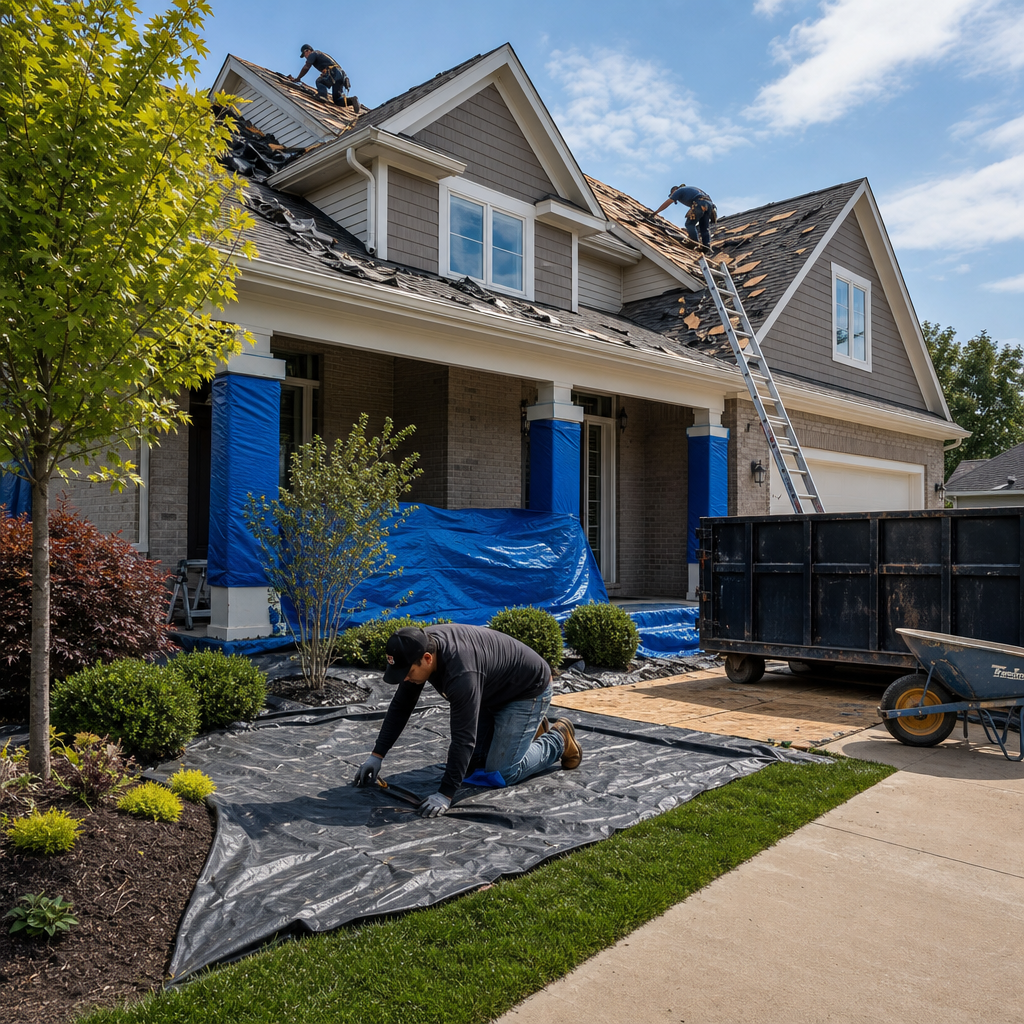
Comprehensive protection at Expert Exteriors starts with a detailed site assessment and extends through every phase of work. We deploy ground tarps beneath your entire work zone to catch debris, nails, and shingles that fall during removal and installation.
Our protection strategy includes:
- Heavy-duty tarping of the work area and surrounding landscape
- Plastic sheeting on windows and vents to prevent dust infiltration
- temporary roof coverings or tarps for overnight weather protection
- Equipment placement that minimizes impact on landscaping and adjacent structures
- Daily cleanup sweeps to contain debris and prevent scatter
We also position dumpsters strategically to contain old roofing materials and limit their movement across your property. Crews are briefed on access routes before arrival, so foot traffic stays confined to planned pathways rather than trampling through gardens or flower beds.
For properties with HVAC units, attic vents, or other exterior features sensitive to dust and debris, we install protective barriers or temporarily seal these areas. This prevents contamination of mechanical systems during material removal.
Your action: Walk your property the day before work begins and mentally map high-priority areas (gardens, vehicles, outdoor equipment) that need extra protection.
Protecting Landscaping and Exterior Features During Roof Work
Your landscaping and exterior features deserve dedicated attention during a roof replacement. Trees, shrubs, and gardens below the work zone face damage from falling materials, foot traffic, and debris scatter. We use tall cardboard or plastic barriers around sensitive plantings to shield them from impact.
Roof debris includes nails, shingles, flashing, and tar. These materials can embed themselves in mulch and soil, creating safety and aesthetic issues. Heavy tarping over landscaped areas prevents this contamination while still allowing rain and air circulation.
Gutters, downspouts, and fascia near the roof edge are temporary work zones. We protect these fixtures with plastic sheeting and padding to prevent dents or damage during material handling. Siding on upper walls also gets protected if close to the work area.
Consider requesting that crews perform a final magnetic sweep of your landscaping after completion. Metal debris from nail removal and fasteners can hide in grass and mulch for months, posing risks to mowers and feet.
Your action: If you have extensive landscaping, take photos of your gardens, trees, and plantings before the project begins. This documentation helps crews understand what’s valuable and justifies more careful protection measures.
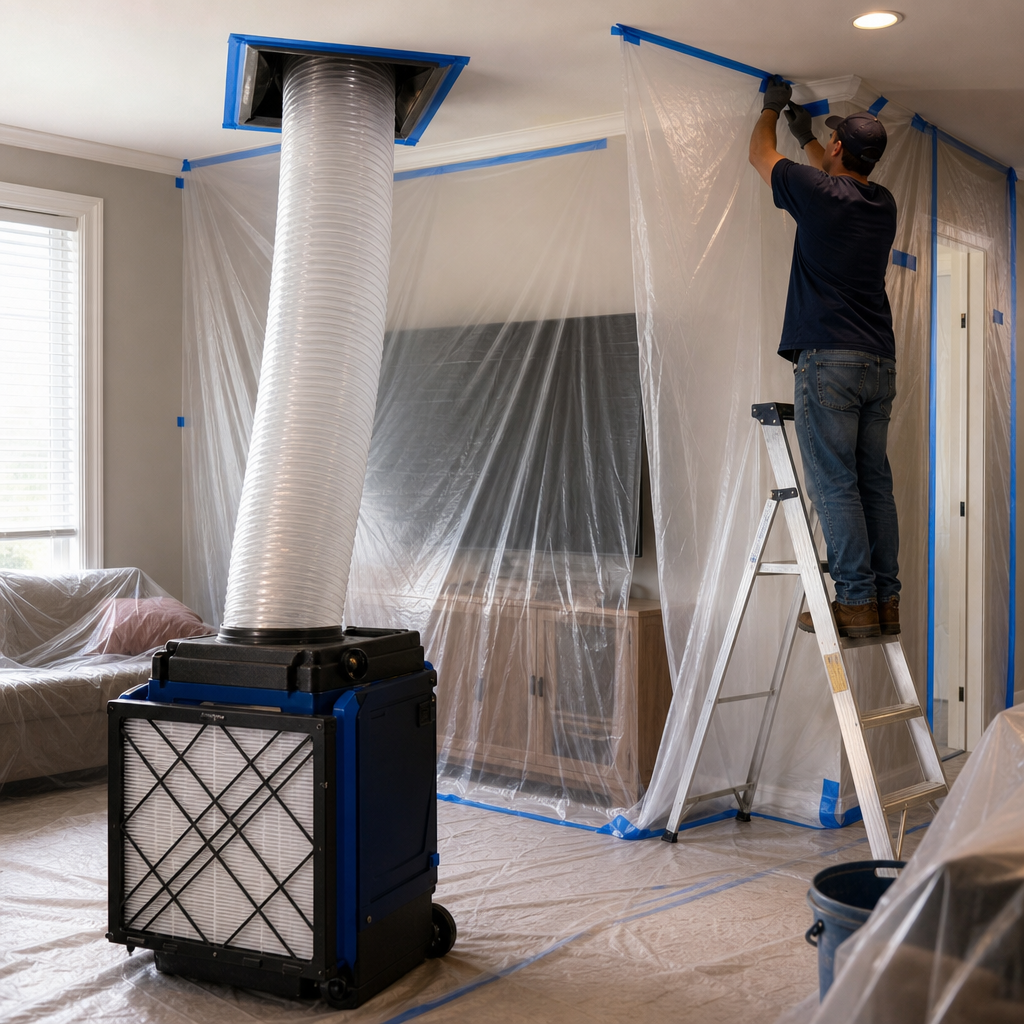
Interior Protection Strategies We Use to Minimize Dust and Debris
Old roofing material creates surprising amounts of dust and fine particles that can infiltrate interior spaces through attic vents, gaps in the attic access hatch, and ventilation systems. We address this with multiple interior barriers.
Plastic sheeting seals attic access points and vent openings from the inside. HVAC systems get protected at return air intakes to prevent dust from circulating through your home. Ceiling fans should be turned off during work, and portable HEPA filters in main living areas help capture airborne particles.
If you have an attic that’s regularly accessed or contains stored items you want to protect, let your contractor seal it proactively. This adds minimal cost but provides significant peace of mind, especially if you have asthma, allergies, or respiratory sensitivities in your household.
We also recommend opening windows in certain areas to create air movement outward, reducing the likelihood of dust settling on interior surfaces. Your contractor can advise on which rooms to ventilate based on your roof configuration.
Your action: Run a whole-home air filter or open windows in living areas during work hours, then close them to contain any dust that does enter. This simple air management reduces interior cleanup time.
Managing Roof Replacement Timing and Weather Considerations
Timing a roof replacement requires balancing your schedule, weather forecasts, and contractor availability. Spring and fall offer the best conditions in Wisconsin, with moderate temperatures and lower rain frequency than summer months. Winter roofing is possible but more challenging and typically slower.
Weather during the project affects both timeline and protection measures. A sunny forecast allows faster work and simpler tarping solutions. Rain forecasts trigger more robust temporary roof coverings and potentially compress work into fewer consecutive days.
We monitor five-day forecasts closely and adjust scheduling accordingly. If rain is predicted during your project window, we increase overnight tarping coverage and ensure every roof section has temporary weather protection before crews leave for the day. This prevents water intrusion during overnight exposure.
Document the weather forecast at the start of your project and ask your contractor how it affects their protection measures. A project scheduled during rain-heavy periods may cost more due to enhanced protection requirements, but it’s worth the investment.
Your action: Request your contractor select a project start date with at least five consecutive days of favorable weather. If that’s unavailable, confirm that enhanced weather protection measures are in the contract.
What to Expect with Our Damage Prevention and Cleanup Process
Damage prevention is ongoing throughout the project, not something handled only at the end. At Expert Exteriors, crews perform daily cleanup sweeps that collect loose debris, organize materials, and ensure your property stays safe and organized.
Our cleanup process includes:
- Sweeping work areas and removing visible debris daily
- Collecting nails, shingles, and metal pieces for proper disposal
- Clearing gutters of debris that accumulates during work
- Removing tarps and protective barriers as work zones progress
- Final site inspection and magnetic sweep of the entire property
- HVAC system inspection to confirm no dust infiltration occurred
Final cleanup happens on the last day of work, with a comprehensive review of your property. We photograph the completed roof and take before-and-after shots of landscaping and exterior features to confirm no damage occurred. This documentation serves as a record for your insurance and personal files.
If damage is discovered during cleanup, we document it, photograph it, and address it immediately rather than waiting for follow-up calls. Transparency and accountability at this stage build trust and prevent disputes.
Your action: Walk your property with the crew leader on the final day before they leave. Point out any areas you want inspected or cleaned up before you sign off on the project.
Documenting Your Property Condition Before Work Begins
Pre-project documentation protects both you and your contractor by establishing a baseline of your property’s condition. We provide property owners with a pre-work inspection checklist and recommend taking photographs of any existing damage, landscaping condition, or cosmetic issues.
This documentation matters if questions arise later about what damage occurred during the project versus what existed beforehand. Photographing your driveway, siding, gutters, landscaping, and roof perimeter creates an objective record. Include close-ups of any cracks, stains, or wear visible before work begins.
Interior documentation is equally important. Take photos of attic conditions, ceiling condition in upper rooms, and any existing water stains or damage. This prevents misunderstandings if interior dust or minor water seepage occurs during the project.
Store these photos with your project contract and invoice. They’ll prove invaluable if your insurance company ever asks about damage timing or if you need to reference project conditions for future reference.
Your action: Use your smartphone to photograph your entire property exterior, roof edges, and landscaping from multiple angles two days before your project begins. Save these photos in a dedicated folder labeled with the project date.
Working with Expert Exteriors for Maximum Peace of Mind
Protecting your property during a roof replacement comes down to choosing a contractor who prioritizes prevention, communicates clearly, and takes accountability seriously. We’ve built our reputation in Brookfield and surrounding areas on delivering not just quality roofing, but also a respectful, damage-conscious work process.
Our team understands that your home is your most valuable asset. We treat it that way by implementing the protection measures outlined above as standard practice, not optional extras. From initial consultation through final cleanup, we’re focused on your peace of mind.
If you’re ready to move forward with a roof replacement project and want a contractor who takes property protection seriously, we’re here to help. Contact us for a comprehensive assessment and detailed project plan that addresses your specific concerns. We’ll walk through every step, answer your questions, and ensure your property is safeguarded throughout the entire process.
Your action: Schedule a pre-project consultation with us to discuss your specific property needs and confirm all protection measures align with your expectations. We’ll provide a written protection plan tailored to your home.
For further reading: Exterior replacement timelines, Coordinated project management, Exterior services protect property.